|
The Faeries' Ruin - Puzzle/Battledome Solutions We're really happy to have been able to work on this plot; it's been loads of fun and we're thrilled at how much you lot have seemed to enjoy it :-) - Puzzle 1: The Artefact Thief - Puzzle 2: Nox's Locks - Battledome: Into the Fray - Puzzle 3: Shhhhhhh! - Battledome: The Battle of Brightvale - Puzzle 4: The Shadows Beneath - Battledome: The Shattered Plain - Puzzle 5: The Plain of Peace - Puzzle 6: Xandra Note about "TO BE CONTINUED" Whenever "TO BE CONTINUED" appeared below a comic chapter, that meant that there were no new puzzles or Battledome waves to engage in, and players could wait for the next step. Upon finishing each puzzle, the same "TO BE CONTINUED" image was displayed, until the next comic chapter was released. As much fun as it is for us to watch users scramble around, trying to find if there's more to the plot when there isn't, the sense of closure you get when seeing that "TO BE CONTINUED" image is probably better ;) The first puzzle was a flashback of Hanso narrating how he'd stolen the faerie artefact from Xandra's library. Players clicked on a map in order to move Hanso around, trying to avoid Xandra while collecting artefacts and bonus items. Puzzle completion: Pick up all four glowing green artefacts, and then reach the exit door. The four artefacts were scattered around the library, hidden behind bookshelves, tables, etc. The player's task was to collect four specific artefacts (the ones Hanso actually stole) and then make it to the door. If the player failed at their task, Xandra would interrupt Hanso and say that Hanso was telling the story wrong. Then she would take over and "tell" the story (i.e. let the player try again). If the player failed again, this time Hanso would interrupt. This cycle would repeat until the player successfully completed the puzzle. 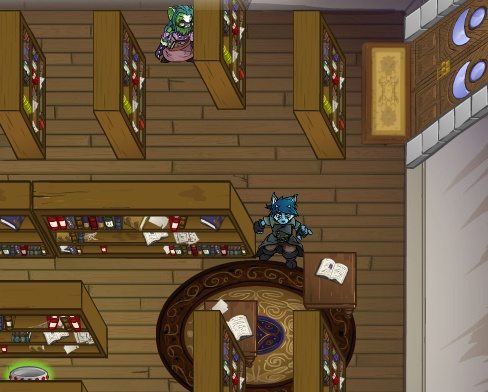 There wasn't much particularly puzzling about this one; it was pretty straightforward. Clicking on a tile adjacent to Hanso would move him there (he could move horizontally, vertically, or diagonally); clicking anywhere would subsequently show Xandra's move. There were six different library layouts, one of which was randomly chosen each play-through. Players simply had to get Hanso to the exit after collecting all four glowing artefacts. Leaving the room without picking up all four forced you to restart the puzzle; getting shot by Xandra's energy blasts also forced you to restart the puzzle.
There were three bonus items (books) that players could pick up off the floor, but these items were only placed into the player's inventory if they successfully completed the puzzle after picking up the bonus item. Achievements:  Ooh, Shiny! - Pick up the artefact that started this whole mess. Ooh, Shiny! - Pick up the artefact that started this whole mess.» To get this achievement, the player had to pick up the faerie artefact that Xandra used to freeze the faeries.  The Task at Hand - Avoid being distracted by irrelevant fripperies. The Task at Hand - Avoid being distracted by irrelevant fripperies.» The player had to complete the puzzle without picking up any of the bonus items.  Proximity Warning - Narrowly escape Xandra's scholarly wrath. Proximity Warning - Narrowly escape Xandra's scholarly wrath.» The player had to approach within 1 square (diagonal or horizontal) of Xandra, and then successfully complete the puzzle. The second puzzle required players to guide the heroes out of Hubrid Nox's castle, using a complex control mechanism that would remotely open or close the castle doors. Puzzle completion: Get all heroes out the front door after unlocking it. Players had to manipulate the control box's knobs so as to open the doors in a sequence that would allow the heroes (indicated by golden pegs in each "room") to make their way to the exit. The layout of the castle changed for each player; the castle had four floors, and each floor had three variants. The door colors were randomized for each player, but the door layouts were the same for a given floor variant (for example, player A might see that doors 1, 3, and 6 were blue; player B might see that those same three doors are all green).  The knobs on the control machine dictated which doors would open in what sequence. All five knobs had to be pointed at a color (red, green, or blue) before the machine could be started. Once started, it would run through the sequence, opening and closing various doors, and showing the results. The heroes' voices could be heard through the speaker at the upper right of the machine, giving clues about what had just happened to them.
The other heroes (Altador, Jazan, the Ogrin Master, and Altador's skeith and draik guards) were split up into 3 groups. Players were supposed to think that Xandra was with one of the groups (and indeed the heroes all thought she'd been trapped with someone else), but in fact Xandra had eluded the trap and gone off to kill Hubrid Nox in the Haunted Woods. If two separate groups of heroes ever had a door open between them, they would join together into a single group. If any group of heroes entered a room with a skull, snake, scarab, vortex, or freeze ray icon, that group would be stunned for one turn and would not move, which naturally interfered with the player's intended sequence. There was one other door, a glowing green door, which did nothing, but was a reference to the Corridor of Chance in Nox's Castle. In order to get the players out the front door, the player had to maneuver one of the groups of heroes to find the golden key, and then proceed to the exit. Once the group with the key reached the exit, the door was unlocked and any group could exit. Achievements:  We All Scream - Everyone loves an ice-cold bowl of Chintzy Mynci... even Hubrid Nox. We All Scream - Everyone loves an ice-cold bowl of Chintzy Mynci... even Hubrid Nox.» To get this achievement, all hero groups had to visit the ice cream room before leaving the castle. If two groups combined, and one of them hadn't yet visited the ice cream room, the combined group was considered as not having visited the ice cream room (since it would now contain members who had not been there).  Fort Nox - There's gold in them thar halls! Fort Nox - There's gold in them thar halls!» Players had to find the treasure room. The treasure room was randomly located for each player, and changed on each play-through of the puzzle. The treasure room could only ever be a room that only had two colors of door (not one or three), and touched an external wall. The treasure would only be discovered if the third (missing) color of door was opened while a hero group was in this room.  And One For All - "After you." "No, after you." "No, I insist! After you." And One For All - "After you." "No, after you." "No, I insist! After you."» To get this achievement, players had to get all the hero groups combined into a single group, and then exit them from the castle together. This was the first Battledome phase of the plot, facing off against three types of Wraiths. There was no puzzle in this phase, though there were achievements.
Achievements:  A Winner Is You! - Good, you managed to avoid stabbing yourself. Now get back into the fight! A Winner Is You! - Good, you managed to avoid stabbing yourself. Now get back into the fight!» Defeat (win or draw against) any Wraith.  Stand Your Ground - A good defense is the best... defense. Stand Your Ground - A good defense is the best... defense.» Use the Defend skill three times in battles against Wraiths. It could have been the same battle or multiple battles.  Five of a Kind - If this keeps up, we'll win this battle in no time. Five of a Kind - If this keeps up, we'll win this battle in no time.» Defeat (win or draw against) five of each of the three types of Wraith. Players had to organize the books in the dusty Brightvale Royal Archives until Brynn found the book she was looking for. Puzzle completion: Get all 60 books properly organized. In this puzzle, players were presented with four shelves full of books, as well as additional books on a table. The goal was to get all the books sorted in the proper order, on the proper shelves. Players played the part of library interns hired by the yurble librarian, instructed with reorganizing the archives. 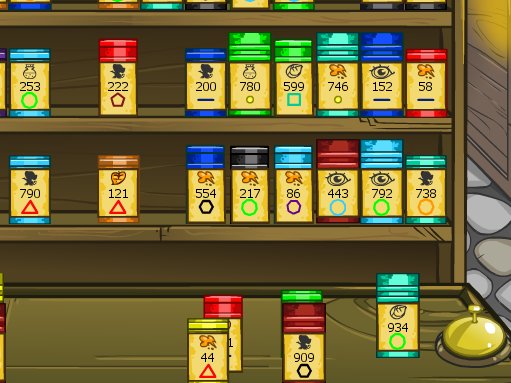 Each of the 60 books was from one of six categories, randomly chosen from a pool of 30 categories. Two of the categories were decoys; books in those categories did not belong in the player's room and had to be thrown into one of the two adjacent rooms (one decoy category's books had to be thrown through the left door, and the other decoy category's books through the right door).
The remaining four categories corresponded to the four shelves. Each shelf was labeled with the name of the category, and each book had (among other things) a symbol on its spine indicating what category it belonged to. The categories and symbols are as follows:
Contrary to popular belief, the symbol for "Forbidden Lasagna Recipes" is an orange Meowclops. For each category, there was a particular algorithm for determining the order its book should be placed on its shelf. There were six algorithms:
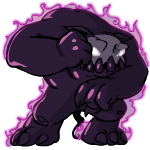
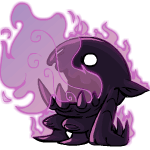
However, any books that were in the wrong position would be knocked off the shelf and onto the table by the librarian. Achievements:  They're Flying Off the Shelves! - Go home, book! Are you too good for your home?! They're Flying Off the Shelves! - Go home, book! Are you too good for your home?!» Throw away all 20 decoy books.  Son, I Am Disappoint - You literally could not be any more wrong. Son, I Am Disappoint - You literally could not be any more wrong.» Get all 60 books knocked off the shelves simultaneously.  First Time's the Charm - You blinded him with library science. First Time's the Charm - You blinded him with library science.» Get the books in the correct order before calling the librarian the first time. Once the puzzle was completed, players could get this achievement by getting it right the first try on your next play-through; players did not have to get it right the absolute very first time they played. This was the second Battledome phase of the plot, facing off against six Spectres: three clones of earlier Wraiths (the Minion, Brute, and Fury), and the new Destroyer, Conqueror, and Zealot. There was no puzzle in this phase, though there were achievements.
Achievements:  The Welcoming Committee - These new spectres got what's coming to them. The Welcoming Committee - These new spectres got what's coming to them.» Defeat (win or draw against) one each of the three new Spectres.  Six Up, Six Down - Queue up, please! We haven't got all day. Six Up, Six Down - Queue up, please! We haven't got all day.» Defeat (win or draw against) against one each of the six Spectres in the order they were released: Minion, Destroyer, Brute, Conqueror, Fury, Zealot.  Well-Rounded - Caution is normal, so don't jump to fierce conclusions. Well-Rounded - Caution is normal, so don't jump to fierce conclusions.» Use Fierce, Cautious, Normal, and Jump attacks once each against any Spectre. Xandra, Hanso, and Brynn needed to escape from a cave where the Spectres had imprisoned them. Puzzle completion: Create a wand to amplify Xandra's magic, in order to break through the barrier protecting the cave exit.  This puzzle contained three phases. The first phase was for the player, playing as Hanso, to find the components needed to make a torch, so that the inner caves (all of which were pitch-black) could be seen.
The torch was comprised of three parts: A stick, a rag, and fuel. Once assembled, Xandra could light the torch using her magic. Navigating through the rooms involved feeling one's way along the walls to find gaps (tunnels) to other rooms. Each cave had a distinct sound or smell associated with it, and each tunnel had a distinct wall texture. Each tunnel also had a different texture at each end, to make mapping the tunnels more complicated. The stick was found on the floor of one of the cave rooms, by searching. The rag was found by talking to one of the NPCs hidden in the dark rooms, who had a spare piece of cloth that could be used to soak up oil. The fuel was a flask of lamp oil held by one of the NPCs. That NPC would not reveal its existence until you had spoken to another NPC who told that he (or she) had been carrying a flask of lamp oil, but it had been lost or stolen somewhere in the cave. Upon talking to the second NPC, you would receive the oil. Flailing one's arms did absolutely nothing. :-) The second phase consisted of traveling through the caverns (with your lit torch), and freeing the NPCs therein, who were all stuck to the ground by mysterious purple tendrils of goo. In order to free an NPC, players had to pull on their limbs without being touched by the goo. Each turn, the goo would make a characteristic motion or sound before striking. If the player chose the wrong limb, they would have to start over with that NPC. Otherwise, five successful limb pulls would free the NPC from the goo. Each player had their own mapping of which motion/sound indicated which limb was about to be struck. Each motion mapped to one of the four limbs, except for a fifth motion which mapped to two of the limbs. Once an NPC was freed, he or she would follow Hanso until Hanso returned to the entry cave, where Brynn and Xandra waited. The NPC would then stay there. Once all five NPCs were returned to the cave, the second phase ended. In the third phase, the heroes would explain that they needed something to make a wand from. Everyone emptied their pockets, assembilng items that might work together to fashion a crude wand. There were three types of item for creating the wand:
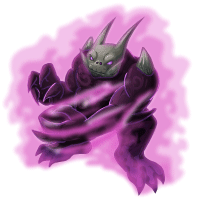
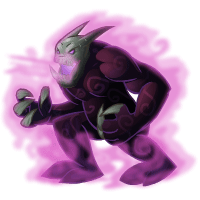
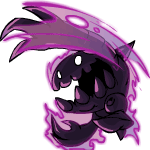
Once the correct combination was assembled, the puzzle was completed. Achievements:  How Many Tunnels Must An Ixi Walk Down? - Uh, all of them, I think. How Many Tunnels Must An Ixi Walk Down? - Uh, all of them, I think.» Visit all 20 rooms of the cave.  The Goo Whisperer - You've got purple on you. The Goo Whisperer - You've got purple on you.» Free all 5 NPCs without being touched by goo. (This had to occur on a single play-through.)  Never Gonna Shut You Up, Never Gonna Quiet You Down - Seal your cake receptacle, you conniving mountebank! Never Gonna Shut You Up, Never Gonna Quiet You Down - Seal your cake receptacle, you conniving mountebank!» Talk to the same NPC ten times in a row. This was the third Battledome phase, released just before the community puzzle component. Altador, Jazan, and the others fought against new Phantom opponents, as well as the (red herring) boss, Oblivion.
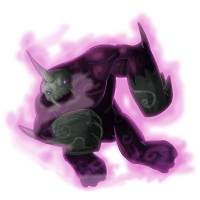
Achievements:  The Phantoms' Menace - Wars not make one great. The Phantoms' Menace - Wars not make one great.» Defeat (win or draw against) one of each of the nine Phantoms.  Medium Rare - I found this one in the bargain bin! Medium Rare - I found this one in the bargain bin!» In any fight against a Phantom, use any item with a rarity of 50 or lower.  It's a Magic Number - Then shalt thou count to three, no more, no less. It's a Magic Number - Then shalt thou count to three, no more, no less.» Defeat (win or draw against) against any Phantom in exactly three rounds. 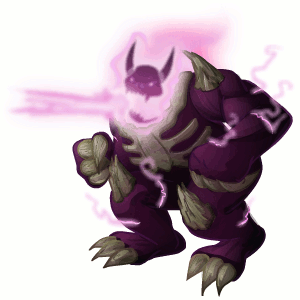 Oblivion
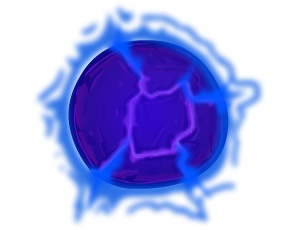
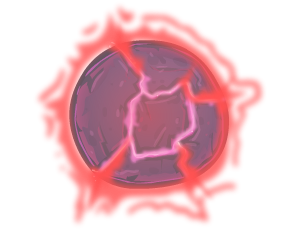
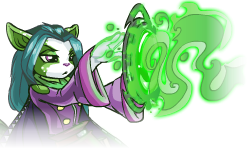
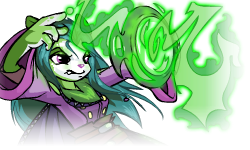
Oblivion worked differently: Players were led to believe that he was the big bad behind the whole thing (not that some of you hadn't guessed the true villain's identity correctly ;-) ), and had a starting hit point cap of 10,000,000. Adjacent to Oblivion's name in the Battledome (during a fight) were two symbols. If you hit Oblivion with magic of the icon on the left, his max hit points would decrease. If you hit Oblivion with the magic of the icon on the right, his max hit points would increase. Oblivion's health decreased to about 9,960,000 before Xandra destroyed him and Faerieland crashed. Oblivion Achievements:  Fight Me Once, Shame On You - Fight me more than once, and earn a chance to win valuable cash prizes! ...Maybe. Fight Me Once, Shame On You - Fight me more than once, and earn a chance to win valuable cash prizes! ...Maybe.» Finish a battle with Oblivion, whether you win or lose.  The Three Phases of Evil - He's good at everything... just not at the same time. The Three Phases of Evil - He's good at everything... just not at the same time.» Battle three different combinations of Oblivion's weakness/strength icon. E.g. fire/air, fire/water, earth/dark.  You're Doing It Wrong - Stop healing him, you cowards! You're Doing It Wrong - Stop healing him, you cowards!» Attack Oblivion with an item that increases his max health. Brynn, Hanso, and Xandra worked together to perform a ritual of spells that would (supposedly) unfreeze the Faeries and save Faerieland. Alas, things did not go as planned... To "complete" this step, players had to either successfully decipher a spell, or reinforce the barrier shield once. Finding the Spell Xandra was unsure about which spells she needed to cast, so players assisted by going through the spellbook and trying to find the one she needed. Puzzle completion: Successfully decipher a page from the spellbook. This portion of the community puzzle involved the spellbook (the one Brynn had found in the archives). A section of the book contained enchanted pages that could reveal any one of precisely one million different spells. The spells were all enciphered with ancient runes, however, and so players had to decipher each page in order to see whether it was the next spell Xandra needed. 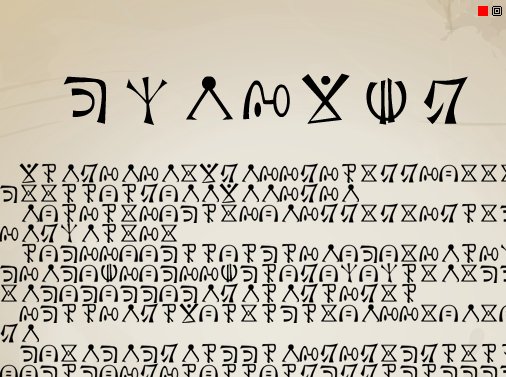 However, sometimes when Xandra examined the deciphered page, she would realize that not only was that spell wrong, but all spells which shared that page's code pair. The code pair was a combination of symbol and color displayed up in the corner of each page (as well as on the main list of pages). When a code pair was ruled out, all pages with that code pair were eliminated from consideration.
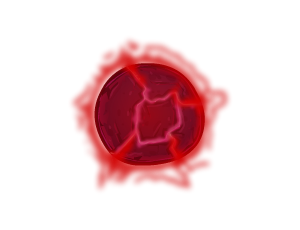
Once the correct spell was found, Xandra would begin casting that spell. The casting process took several hours per spell; once the next spell was being cast, the book would reset and players could again search for the next spell in the sequence. In order to actually decipher a page, players had to figure out which three of the seven symbols at the top of the page appeared least often in the body of the page. Clicking those three symbols (in any order) would decipher the page. Reinforcing the Barrier Xandra also cast a barrier shield to protect her from the onslaught of the Phantoms. The barrier weakened over time and had to be replenished by the players. Puzzle completion: Participate in a barrier strengthening group, and guide the reinforcement orb into place in the barrier shield. This was the group portion of the puzzle. Users joined random groups (or, later, groups with their friends) in order to attempt to use a fragment of Phantom energy to reinforce the barrier shield. Users could specify a preference for one of the four stations involved in the process, or they could let themselves be assigned randomly. Once all four spots in the group were filled, the process would start. Depending on which station they were at, each player had to complete a different task in order to successfully reinforce the barrier shield. Stabilization In this station, the player had to keep the fragment's core stabilized. The core would randomly change size and color, and the player had to cast the correct spell to match its characteristics. If the incorrect spell was cast, the core's stability degraded from Stable to Unstable, or from Unstable to Critical. Casting the correct spell would raise the stability from Critical to Unstable, or from Unstable to Stable. The number of energy spikes emitted by the core (see the section on Suppression, below) was affected by the core's stability. The core had three characteristics: size, tint, and intensity. There were three values for each:
The somatic component corresponded to the tint of the core:
The verbal component corresponded to the size of the core:
The reagent powder corresponded to the intensity of the core:
Containment In this station, the player needed to cast spells to keep the fragment's containment field stable. The containment field consisted of six sectors arranged in a sphere around the core. Each sector had a percentage strength value; if the strength of ANY containment sector was outside the nominal range for three consecutive rounds, the containment field would collapse, the core would explode, and the entire attempt would fail. (Sectors outside the nominal range had their percentage indicator color-coded red. Green was ideal, and yellow was less ideal but still within nominal range.) 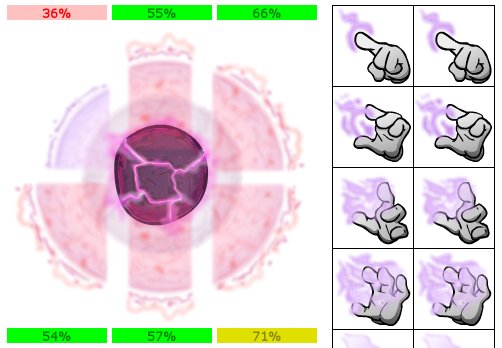 The containment fields needed to stay within 40-80% (inclusive). Each field sector would drop by a random amount each round (3% to 30%, weighted more toward smaller changes), or occasionally increase in strength by a small amount. The player at the Containment station had 12 spells to cast; two each of the following percentages:
Each spell had a one-round cooldown, so that if used in a round, it could not be used in the following round. Guidance In this station, the player had to physically push the orb fragment into place in the barrier shield. If this station's task was completed successfully before the containment field ruptured, the task was considered completed successfully for all the players involved. 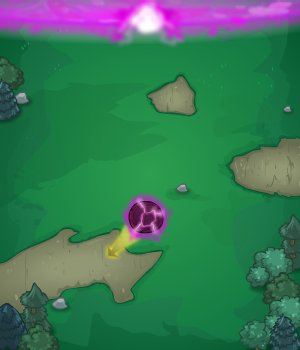 In order to push the orb, the player selected a strength value for each of their four limbs (two arms, two legs). Each limb could be set to Strong, Medium, Weak, or None. Each Strong push would contribute 5 metres of motion upward toward the goal. Medium pushes were worth 3 metres, and Weak pushes were worth 1 metre. If the player set more than 14 metres' worth of push in a single round, they would fall down and have to spend a round getting back up.
Additionally, the difference between the left and right pairs of limbs would affect the orb's lateral (sideways) movement. Pushing for 10 metres with the left limbs, and 3 metres with the right limbs, would cause a movement of 7 metres to the right. Complicating matters was the orb, which randomly moved several metres away from the target each round. The player had to take its motion into account in order to correctly gauge how much force to push the orb with. Once the orb came within 5 metres of the target point, the task was completed. Suppression In this station, the player had to place suppression shields between the core and the group members, because the core would randomly shoot out energy spikes that, if not blocked, would stun a player for one round.  Each round, the core would prepare to fire some number of energy spikes. The number varied depending on the core's stability; 1-2 when the core was stable, 2-3 when the core was unstable, and 3-4 when the core was critical. The player at the Suppression station had 10 shields to start with, and replenished 1 shield per round. Any unblocked spikes would stun that player—even including the Suppression player—for one round. Blocking all spikes was critical for allowing the other players to do their tasks without interruption.
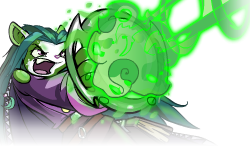
Achievements:  Errand Spelling - It's so handy having thousands of minions every time something puzzling comes up. Errand Spelling - It's so handy having thousands of minions every time something puzzling comes up.» Successfully decipher one spell page, and complete one barrier task.  Cast Away! - Everyone gets an achievement! Even this inanimate carbon rod! Cast Away! - Everyone gets an achievement! Even this inanimate carbon rod!» Once Xandra reached 10 spells successfully cast, everyone who visited the ritual page got this achievement.  Jack of All Stations - I swear, if I get stunned one more time... Jack of All Stations - I swear, if I get stunned one more time...» Successfully complete a barrier reinforcement at each of the four stations (Stabilization, Containment, Guidance, and Suppression). Xandra chased Hanso through the ruins of Faerieland, firing powerful energy blasts at him. Hanso, having stolen half the artefact, absorbed these shots with it, taunting Xandra with witty insults. Puzzle completion: Insult Xandra 5 times without overloading the artefact. This puzzle was complex internally but displayed only one interface option to the player: choose an insult. The power of the blast Xandra fired was determined by a combination of her mood, her distance from Hanso, the base spell power she chose, and Hanso's insult. These four factors were added together to determine the final spell power (with a minimum of 0%, so even if the factors might combine to a negative number, the amount of power absorbed by the artefact would not decrease from round to round). Each play-through, the player would receive 10 random insults from the overall pool of 20 insults. Each insult could only be used once per play-through, although once the player won (or lost) the puzzle, they could try again, with a fresh set of insults. Although the power changes were displayed as percentages, internally the power was a value from 0 to 10,000, then divided by 100 and displayed as a percentage (e.g. power level 8412 = 84.12%). The power level numbers will be used here. Xandra's spells were powered as follows:
(range * -10), decreasing the power by 10 for each metre from Xandra. (Hanso and Xandra would never approach closer than 10 metres, or separate by more than 50 metres; their distance was determined randomly each round.)The mood modifier was based on Xandra's mood, as indicated by her artwork and the loudness of her spellcasting.
The insult modifier was hardcoded per-insult, as follows:
If at any time the artefact's power exceeded 10000 (100%), it would immediately release all that energy, causing Hanso to be blown off his feet, and the player would lose. Achievements:  Triumph - How appropriate. You fight like a kau. Triumph - How appropriate. You fight like a kau.» Use all 20 insults.  Over 9000 - What, are you in a hurry? Because clearly we're not. Over 9000 - What, are you in a hurry? Because clearly we're not.» Overload the artefact (to 100% or more) within 3 rounds.  Supercharger - You must have taken Insults 101, because you're pretty good at this. No, seriously, I mean it. I'm not being sarcastic. No, really. Why are you glaring at me? *sigh* Supercharger - You must have taken Insults 101, because you're pretty good at this. No, seriously, I mean it. I'm not being sarcastic. No, really. Why are you glaring at me? *sigh*» Successfully complete the puzzle 3 times in a row without failing. |
|||||||||||||||||||||||||||||||||||||||||||||||||||||||||||||||||||||||||||||||||||||||||||||||||||||||||||||||||||||||||||||||||||||||||||||||||||||||||||||||||||||||||||||||||||||||||||||||||||||||||||||||||||||||||||||||||||||||
| Login to Neopets! | |||
|
|||


|
|||||||

You've clicked on a link that will take you outside of
It is a journey
I must face...alone. *dramatic music*
I want to stay on Neopets,
where the dangers of Meepit invasion are taken seriously.
You've clicked on a link that will take you outside of
It is a journey
I must face...alone. *dramatic music*
I want to stay on Neopets,
where the dangers of Meepit invasion are taken seriously.
You've clicked on a link that will take you outside of
It is a journey
I must face...alone. *dramatic music*
I want to stay on Neopets,
where the dangers of Meepit invasion are taken seriously. 
NEOPETS and all related indicia are trademarks of Neopets, Inc., © 1999-2024. ® denotes Reg. USPTO. All rights reserved. Use of this site signifies your acceptance of the Terms of Use. Your California Privacy Rights
|
|||||||