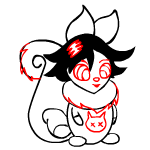
How to draw a Gothic Usuki : Printable Version

Start by drawing a circle for the Usuki's head and a large oval beneath it for the doll's body. Then, lightly sketch a pair of crossed lines on the head circle, which will help you when you draw the Usuki's face.

Next, make a round shape around the bottom of the Usuki's head for her furry ruff of hair. Then, draw two small rounded shapes at the bottom of the Usuki's body for her feet.

It's now time to make the Usuki's large, fluffy tail.

Add the Usuki's long, pointed ears to the top of her head, and then draw her short arms on the body shape. Her left arm (which is on your right) will be only partly visible because she is turned.

Now, draw the Usuki's short hair on her head and add a ribbon to the base of her tail.

It's now time to add some important details to your drawing. First, use the guide lines you made in the first step to draw the Usuki's face. Remember to add pupils and irises (the coloured part of the eye) to her large eyes. Next, give her ruff and tail some furry texture, and fill in the Usuki's dark hair, leaving a bit of it white so it looks shiny. Finally, draw a design on the front of her shirt and erase any extra lines that might be left on your drawing.

Your picture is almost complete! Add a few finishing touches, such as eyelashes, and some light lines to help you with shading when you colour your drawing.

Give your picture some colour using anything you'd like, from crayons to a computer program. Be sure to include some shading and texture to make your drawing extra-special!