include "/home/neopets/public_html/translate.inc"; ?>
Neopets - How to draw a Ruki
How to draw a Ruki : Printable Version
|
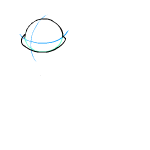
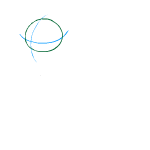
Begin by making a slightly flattened circle for the Ruki's head. Next, lightly sketch a pair of crossed lines on the head
shape to help you place the Ruki's facial features later on.
|
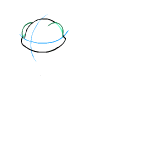
To finish the lower part of the Ruki's head, place a bulge on either side of the circle you just made.
|
|
|
It's now time to draw the ridges where the Ruki's eyes will be. To do this, make a curved line on either side of the Ruki's
head.
|
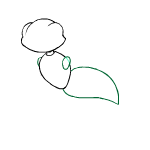
At this point, erase any extra lines you might have. Next, draw two short lines for the Ruki's neck, followed by a large
leaf-like shape for the upper part of its body.
|
|
|
Make another, even larger leaf shape for the Ruki's lower body. Then, draw a small rounded shape on the upper part of its
body for the Ruki's left shoulder (which is on your right side). Its right shoulder (on your left) is formed by adding a small
curved line on the side of the body shape, because the Ruki is turned.
|
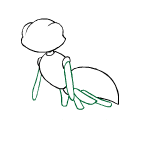
Begin adding the Ruki's arms and legs by drawing a few tubes. Two of the tubes should connect to the shoulders you just
drew, while four should be attached to the Ruki's lower body.
|
|
|
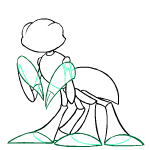
The Ruki's arms are bent, so create its forearms by adding slightly pointed tube shapes that are at an angle to the ones you
drew in the last step. The Ruki's left forearm (which is on your right) will almost completely cover its upper arm because of
the drawing's point of view. Next, finish off the lower part of the Ruki's four legs.
|
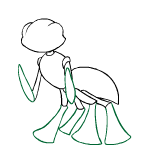
Let's complete the Ruki's arms and legs by adding its pincers and feet. To make its pincers, draw two long, narrow leaf
shapes that are connected to the Ruki's forearms. Next, add a little pair of claws to the ends of each of them. Lastly, draw
the Ruki's feet at the ends of three of its legs (its fourth foot isn't visible).
|
|
Begin adding some detail to the Ruki's face by drawing its eyes and giving it a happy smile. Remember to make the Ruki's
right eye (on your left) much smaller because the Ruki's head is turned.
|
Draw some curved lines inside the Ruki's eyes for its pupils and irises, and then add another curved line to the middle of
the face for its nose. Finally, darken in the Ruki's pupils, but don't forget to leave a little spot of white for the sparkle
in your Ruki's eyes!
|
|
|
Add a pair of antennae to the top of the Ruki's head. Then, draw its wings on the lower part of its body.
|
Erase any extra lines that are left on your drawing. Next, give your Ruki its distinctive armour-like look by adding a
pattern of lines to its body, feet, plus upper arms and legs.
|
|
|
Add some colour to your drawing using coloured pencils, markers, crayons, or even a computer program.
|
Finally, give your Ruki drawing a bit of shading to make it look very realistic and three-dimensional. There you have it -
your very own drawing of a Ruki!
|
|