How to draw a Pteri : Printable Version

Begin by drawing a circle for your Pteri's body. Then draw an almost circular shape that overlaps it. This is the head. Erase the line inside the head until you are left with something like this.

Add two feet and a tail.

Then draw on two wing shapes and the tip of your Pteri's tail. For the wing shape it is best to just try to copy this drawing as closely as possible.

Now draw two spikes on top of your Pteri's head. These will be the feathery tuft. Then draw on the top of your Pteri's beak.

Now add a little more detail. Draw a line inside each of your Pteri's wings to give them a little more shape. Then draw on the bottom half of your Pteri's beak.

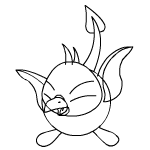
Draw a small tongue shape inside the beak and add a small dot on the top of the beak. This dot is your Pteri's nostril. Above the beak draw a semi-circular line to finish it off. You are now ready to start drawing the eyes. Begin by drawing two slightly curved lines, one above the other on either side of the beak.

Draw two slightly curved vertical lines on either eye to finish off the outline of the eye. Then draw a semi-circular shape in the corner of each eye for the pupil.

Give your Pteri's feet some toes and claws.

Make your Pteri seem more feathery by drawing small jagged lines along the outside of the wings and body. Finish off the tip of your Pteri's tail by drawing four triangular shapes in it.

Now just erase all the extra guidelines and your Pteri is complete!

To make your drawing look great, try adding some colour and shading. It can really bring your drawing alive.