T3: 6 Difficult Game Trophies in 6 Minutes (Part II)
by talekdolorn
--------
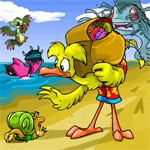
Ever wondered how to get that shiny golden trophy? Or chase up that elusive avatar? With guides abound, it has never been easier to get trophies. Everyone’s writing down tips, but you still can’t wrap your head around it? Talek will take you down the path towards the gamer superstardom. Follow this new series of “Talek’s Trophy Tips”, and every few weeks I will present you with a new tutorial how to make it to the top of the scoreboard. This article will provide a step-by-step tutorial and some advanced insight to reach that extra mile. NOTE: This step-by-step guide will set you on the path to stand the highest chance of getting a champion trophy after the monthly trophy reset. For the month-to-month evolution of the scores, consult Sabre’s TrophyTracker petpage. ![]()  Talek’s Trophy Tips: Quickfire Edition - 6 Difficult Game Trophies in 6 Mins (Part II) Hello, fellow readers. Today’s edition of Talek’s Trophy Tips is a step away from the normal template I use for my in-depth guides. Why you may ask? It is because this so-called “Quickfire” edition will try to elucidate how certain trophies in otherwise difficult games can be acquired in under 6 mins. I have chosen 6 games in particular where mastery walks a fine line with fortune, which means that should all cards fall right, you can end up with a new trophy midway through the month. The tips section for each game will outline the path I took to reach that coveted spot on the high score tables. The Quickfire edition is a two-part series, featuring three games each. So, without further ado, let’s get going with Part Two! The previous version can be found in NT edition 839. ![]()  4. Petpet Rescue Rarity: 7% Avg. Reset Score: 265.8 (closest possible: 265) Avatar: Yes - 250+ Today’s edition starts with Petpet Rescue, a rather scarcely mentioned game in the context of trophy collection despite being an avatar game that nonetheless remains a relatively rare exhibit. You play as a Scorchio navigating the falling rocks, lava-filled chasms and mine railway tracks, as you try and saves as many petpets from Gargrall, all the while collecting as many gems as possible. The premise is simple - reach a petpet and bring it back to the exit without losing a life or without having the time run out (99 seconds). Each level requires an increasing amount of petpets, starting with 4, 6, 8 and so on. The scoring is also pretty self-explanatory: 10 points per petpet saved, and 25 point bonus for completing a level. In addition, there are three type of gems that appear - pink (5 pts each), blue (10 pts) and green (15 pts). A bare minimum of two gems will appear on the first two levels.
The strategy towards a high score, the trophy and the avatar will be based on the first three levels. For those interested, I will also cover level 4. Personally, I have never been beyond level 4, however, scores on the HST nowadays never seem to rise higher nowadays than can be posted in level 4. Likewise, you will not need to know what lies there (if anything is at all) to reach the trophy and the avatar (also it would take us well over the 6 minute mark!). The first level is easy and will take less than 30 seconds to complete. The level starts you with four rows of trains, the middle area - 1 “safe” row, 4 rows of rocks, 1 “safe” row -, and a number of train rows at the end. You will only encounter pink gems on level 1 - it is important, however, that you pick up as many as possible. A maximum of four will spawn so remember to collect all of them before bringing the petpets safe. At the bare minimum you will have 75 points at the end. The second level is also relatively easy and it will take anywhere between 50 and 90 seconds to complete. The level starts with 4 rows of rocks, 5 trains, a similar middle area to level 1, and the far trains. The falling spikes will prove more difficult to avoid than on level 1, so be careful not to lose a life. It is also very likely the petpets will start spawning farther away from the exit, with you having to reach the furthest rows of trains and before you can get them back. I have noticed a pattern whereby the closer the petpets spawn to the exit, the more likely they are to continue spawning close in later levels. This is very important in level 3 and further! Whatever happens, do NOT lose a life in this level. You will need as many as you can muster in level 3, so restart if it gets too hard. In terms of gems and points, you will likely be getting 3 gems or more in this level, with some of them being blue. If I am not mistaken, you will be getting at the very least 15 points from gems in this level, but you can get considerably more - as much as 40 (4 blue gems). By default, you will end the level at about 170-185 points (sometimes 200 if you are lucky!). The third level is the most important one. First off, you will definitely have at least 280 points at the end of it - which will be enough for a trophy. With an average of 265, you might not even need to complete it to get it (particularly if you have lots of bonus points!). The third level will have four rows of rocks, much closer and tighter to each other, then proceed with a whopping 10 trains, before the middle area of 1-4-1. In order to complete this level, you will need to sacrifice a life, even without failing once, as the timer will run out. Also, you will be highly dependent on how far the petpets spawn. You need at least 6 pets to be available between the starting section and the middle area! If you need 3-4 from the far end of the level, it will be supremely difficult, and I suggest restarting the game. You should be able to bring back 4-5 petpets using one life to survive the level. At the end of level 3, provided you save at least 6 of the 8 petpets, you should have enough points for the avatar and the lowest end of trophy range even without big bonuses. If you get big bonuses, all the better as you can go higher. By end of level 3, you will have clocked in around 5 mins, and have enough to get a trophy. Now level 4 is what I deem a bonus level - mandatory to get to gold, but otherwise any points in it give you a guaranteed trophy. You will likely have 280-330 points at the start of it. The level will start with 3 rows of trains, an interim area (1 safe row and 3 rock rows), another set of 4 train rows, and another interim area (3 rock rows). From then on it will alternate 3 rock rows, 3 train rows. Now, this will be a very challenging level to complete, but points-wise, you will likely get about 20-30+ points in the interim areas, and the first few rows will have 1-2 petpets you can bring safe, making it relatively easy. When I scored 385, I had 5 pets between start and the 2nd interim areas and about 30 points in gems (some of which I could not reach on my last life), meaning I had a chance at a considerably higher score at the time.
![]()  5. Snowbeast Snackrifice Rarity: 8% Avg. Reset Score: 290 Avatar: None The second game in the article is Snowbeast Snackrifice, another game that can get you a quick trophy, but requires some sharp reflexes and planning. A disclaimer is required because we do not condone the abuse of petpets, but Snowbeast does not care, and so to appease him, we must do our part in feeding the monster before it goes loose on the Happy Valley. Much like the other games in this guide, the game has a simple premise, but it is considerably difficult to master. Your goal is to push petpets towards Snowbeast’s cave, bypassing the PPL guards, and get as many of them within the allotted time. By holding the mouse button you charge your power, and releasing it pushes the petpets to the front. Be careful as clipping the sides of the petpet will lead you to miss the cave overall, and trying to hold the mouse button for too long will require you to power up again. In terms of quota, for each of the four levels in the game, the required quantity goes up by from 5 to 10 to 20 to 30, and the game ends after level 4. Now, if it all seems so simple, what is the catch? The catch is the so-called “bonus” or “power up” mode which allows you for a limited time to spam as many petpets as possible into the cave without incurring blocks from the guards and requiring to power up. The mode can be achieved for perfectly filling up the power up gauge and successfully knocking a petpet to Snowbeast three times - nothing less will suffice. However, in doing so, the game’s clock is stopped while you are within this mode, allowing you to spam and score extra points, and it can be achieved multiple times, enabling you to farm up the score. So what are some tips and tricks for the game? First and foremost, there are two ways to improve your gauge powering mechanics. One way is to start holding the button with a click and release it when the gauge fills up, while another is to hold it continuously, allowing the power meter to reset and start powering anew if you miss your window for a perfect hit. The first method may seem more self-explanatory, but the holding method enables you to be more efficient in the long run and does not rely so much on you timing your petpet ideally. In holding the mouse button, your character is more mobile allowing you to move it to the right spot and be more likely to hit the petpet when you power up. However, both methods have their own perks and minuses so be sure to choose one which you are most comfortable with. Secondly, the bonus mode itself. There are two ways to go about it: you can stand one in place clicking the mouse button and hoping you aim right; equally, you can move around trying to be selective about petpets you hit, guaranteeing an accurate push but having a lower score ceiling. Either way work as it is less about maximising your points within the mode itself than it is about perfecting your technique to get to the bonus mode. Thirdly, focus on levels 3 and 4 and do not panic. First levels are relatively easy and won’t require you to try too hard to get past them. However, it is easy to get overwhelmed when you see multiple petpets dotting across your screen, but remember if you use the holding technique it actually benefits you as you have a higher chance of timing a petpet right. In order to reach a respectable score of 600-700 (considerably above the 290 average), you will need to get the bonus mode active at least once on level 1, twice on level 2, two to three times on level 3 and three to 4 times on level 4. Also remember - you can carry over petpets between levels! If you hit one or two perfectly but can’t land a third - do not despair as it will carry over into the next level and you can finish the combo there. The game will require you to practise before you can score reasonably well, but with these tips and such low trophy thresholds on resets you are bound to reach a trophy-worthy score in no time.
![]()  6. Rink Runner Rarity: 8% Avg. Reset Score: 104 Avatar: None The 6th and final game is the ice-skating extravaganza of Rink Runner. A rather obscure and unpopular game - with an ever-easier trophy as time goes on - this Bruce-led game still poses to be a challenge for many with lackluster mouse control skills. However, this game is not really about how well you flick you wrist - rather it is all about being tactical and knowing where to place your cursor. The basic premise of the game is simple: you move a Bruce ice-skater, bent on impressing the jury with its moves. As you move, you collect floating notes whilst avoiding to fall into the ice-cold waters on an ever-shrinking ice cover underneath. Every level contains 30 notes to catch - and a bunch of “bad” notes that you are supposed to avoid -, all of which need to be caught in as few moves as possible. The notes disappear after a certain time, which is indicated by their colour changing black-green-blue-orange-red. So how is this guide supposed to help me? Well, by tempering your expectations. Getting a score of 104 - the average reset score - only requires you to complete 4 levels. Not only that, you do not need to play it perfectly. Although each level has a threshold of notes you need to catch, with unnecessary moves docking you a point for every extra move over 30, the limit starts at just 21 on level 2, so you effectively need just 26 per level, leaving you with 4 missable notes or 4 extra moves per level. Additionally, you need to remember that this is not about catching where the notes are, but rather predicting where they are flying. You need to visualize where it will be in about 2-3 seconds from where you are. Say it is going vertically upwards, aim about a quarter to a half above it. Likewise - always group multiple notes that are flying in one direction. This is imperative to save all the extra moves you can make as a mistake and still not fail.
![]()  Now when it comes to advancing through the game, the first level is the only level with a very lenient threshold (meaning there is none) so you will be able to pass it regardless. You have the entire ice sheet to move on so do not worry about anything - focus on nailing on the notes if you can and getting that sweet 30 points from the get go. If you are struggling with aiming and positioning, try to lower your level expected threshold to 25 or so. Getting through 5 levels should be enough for a reset trophy and you can make up the points in levels 5-6 even if you do not get any further. ![]()  The second level will see the ice sheet shrink, opening small holes on the field, but ultimately will not impede your progress much either. Right off the bat, ignore on-screen messages about getting docked points for collecting the bad notes - they are meaningless and do not affect the score at all. You only need to focus on the total amount of notes caught and total amount of moves. And preserving your Bruce, naturally. The notes will start green so it will still take some time before they turn red and disappear. Focus on preserving your Bruce and getting over that 21 threshold. However, this leads you to levels 3 (22 needed) and 4 (23 needed). Level 3 sees the ice cover shrink even more and start to reveal the final four ice floes. Likewise, However, you will still have some extra bits of ice left towards the middle and the sides, which will make your job easier. At this point it is a good time to start strategizing your moves for levels 4 onwards. ![]()  As you can see, you will have four ice floes to stand on of varying size when you move about. This will stay the same for all subsequent levels, with only the number of notes needed rising up to 30 from level 11 onwards. Now this is the most important bit of the strategy: as you can see, the sizes of all four ice blocks are not the same. The left ones are pretty similar in size, and quite large at that, which makes it considerably easier to catch wayward notes what with them flying in randomly from either side. However, the bottom right one is super small, and you end up having very little room for error when it comes to the very bottom and the very right of the screen. Therefore, you need to remember to ALWAYS try and keep your Bruce on the right side of the screen, preferably as close to the edge of the top right ice floe, and getting the notes on the right FIRST. If you are aiming for a lower, safer score, you can forego certain notes in order to preserve yourself as some of those notes are the hardest to get. But try to time getting the red ones by the right side first, as they have a limited window over the surface. Likewise, make use of the borders of the ice floes. Despite your Bruce being nimble, it occupies more pixels on the screen than it seems. Hence, you can actually catch some of the notes that are just beside an ice floe if you time your landing right. ![]()  Now, if you are going for a longer run, and a better trophy at that, follow the same tips laid out for level 3 onwards, and keep perfecting the technique of collecting all notes at a time. I have achieved 400+ points on several occasions - and that is not even the highest score recorded - and it takes less than 6 minutes for 250+ points, so it is certainly possible to get a ton more than just the hundred for the bronze by remembering these tips and practising. Below you can see a snippet of my best run (and a silly mishap which ended it!): ![]()  End Note This concludes Part 2 of the Quickfire edition of Talek’s Trophy Tips. Hope you liked this concentrated collection of tips and tutorials to help you get those difficult trophies in under 6 mins. I will soon be back with even more guides and other games-related content. *** Struggling to get a trophy? Want tips on a certain game? Neomail me and I will consider including the game in an upcoming article for Talek’s Trophy Tips. Thank you to Sabre’s TrophyTracker petpage for the average reset scores. Thank you to Mynci’s Tckaninny petpage for the average trophy rarities.
|