 Assignment 53: Earn that Avatar and Trophy!
by _brainchild_
--------
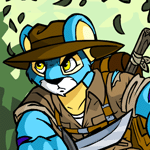
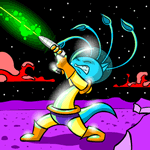
Assignment 53: Earn that Avatar and Trophy! Do you jump for joy upon earning another pretty avatar for your collection? Do you spend countless hours polishing the 100+ trophies in your cabinet, still yearning for a new addition? Or are you just a fan of Aishas? If you answered “yes” to any of these questions, then this guide is for you. I love this game a lot, so I will provide a walkthrough of the flash game Assignment 53, explaining how I managed to complete each level. I found out some of the information, such as the locations of secret areas, from Jellyneo.net, a popular Neopets fan site. However, I will tell you up front that the avatar and the gold trophy require a significant investment of time. You will not earn the 20,000 points required for the avatar in one hour. You must practice the levels and familiarize yourself with the ways in which they are laid out. ---Game Mechanics--- In Assignment 53, you use the arrow keys to move your character, an Alien Aisha who is trying to rescue five Aisha friends who were unlucky enough to crash their spaceships. Therefore, they are stranded on peculiar, hazardous planets throughout the galaxy. These areas contain vicious monsters whom you must fight. You can defeat most of them by jumping on them, but a few species can only be killed with a Force Field. Any defeated monster will earn you 30 points, except for the final boss, which is worth a whopping 1000 points. However, this enemy is much more difficult to beat. There are two “acts” per planet, meaning that each of the five planets contains two levels, adding up to ten levels in total, except for the final boss. At the start of the game, you will be asked to choose between the green Alien Aisha, Eddix, and the pink one, Moxi. Both of them perform exactly the same way while playing, so it doesn’t matter which one you choose. You will start with three lives. Within each life, you can be hit twice. You get hit whenever you run into an enemy, or if a projectile strikes you. Enemy projectiles can pass through walls, so watch out for ambushes! If you are hit three times within a single life, you are defeated, and you are sent back to the start of the level, or the last checkpoint that you visited. To prevent this from happening, you can heal damage by eating Gross Foods, which Alien Aishas find delectable. (A Gross Food consumed at full health will earn you 100 points.) If you run out of lives, your game ends, and your Aisha has failed the mission. However, you can collect Nerkmids to earn extra lives. Every 100 Nerkmids collected will give you an extra life. Nerkmids are also worth ten points each, which adds up very quickly. (However, these points are not counted until you complete the level.) When I finished my playthrough, I had amassed around 1050 Nerkmids, which earned me 10,500 points! Those points are CRUCIAL if you are looking to obtain those 20,000 points, or an even higher score for the gold trophy on the first day of the month. You will also lose a life if you fall off the land and into the abyss, or if you run out of air. However, you will receive extra points for the air remaining when you finish a level; that is your time bonus. More leftover air will give you more points. ---One note: Jellyneo’s guide about Assignment 53 contains a code to start the game with an extra life, but I couldn’t get it to work. Power-ups include Force Fields, Gravity Boots, and Speed Wings. A Force Field will make you invincible for fifteen seconds, unless you fall off the land. You will be able to destroy any monster by simply touching it, including certain species that can’t be defeated otherwise, since you can’t jump on them. Gravity Boots will dramatically increase your jumping height, allowing you to reach previously inaccessible areas in some cases. You can also use them to perform a “wall jump”, meaning that you jump, hit the wall, and jump again in the opposite direction. (This trick will be useful on the third planet.) However, you will lose the boots if you are struck. Speed Wings allow you to run faster for ten seconds, but you still can’t fly, even though the item is a wing. Like the boots, you will lose the wing if you are hit. I usually don’t find the wing very useful, since my Aisha moves too fast, so I can’t control her. However, the Gravity Boots are a REQUIREMENT for a gold trophy, since certain areas containing tons of points are off-limits without them. “Secret areas” are hidden locations which contain helpful items. You access them by passing through a wall that looks just like an ordinary wall. (Don’t worry; this isn’t a glitch. It was done on purpose.) I will mention all of the secret areas during this walkthrough. Some of them contain considerable amounts of points which are required for the gold trophy. ---Walkthrough (Level-by-Level)--- ---Planet One: Wuba Prime--- Here are the enemies which you must watch out for. Don’t run into any enemies because they will damage you. ---Green Lizards: They simply walk on the ground. Jump on them to defeat them. ---Red Flowers: They stay in one place and shoot projectiles at you, one at a time. Avoid said projectiles, and jump on them to destroy them. ---Three-Eyes: They walk around, but they don’t shoot projectiles. Jump on them. ---Orange Flowers: They stay in one place and shoot projectiles at you, three at a time. Similar to the Red Flowers, they will be defeated if you jump on them. ---Act One--- Jump upward to walk on the higher platform and collect the Nerkmids. Defeat the Green Lizard and the Red Flower, avoiding the latter’s projectiles. Ride the moving platform upwards, then jump at the wall to reveal a secret area. Walk through the wall and collect the Gross Food. Then go back to the moving platform and fall down. Jump on the three-eyed monsters and the Orange Flowers, then walk to the finishing point. There is a stationary platform to the left of the moving platform which contains a Force Field. While you can use it to defeat enemies, it is out of the way, so you won’t earn as many points from your remaining air bonus when you finish the level. ---Act Two--- Ride the moving platform to the other side of the chasm; don’t fall off of it. Collect as many of the floating Nerkmids as possible. A Red Flower will try to shoot you down, so avoid its projectiles. Ducking may be useful; you duck by pressing the down arrow key. Jump on the flower, then ride the next moving platform upward. Defeat the three-eyed monsters, then ascend the stationary platforms, collecting all of the Nerkmids along the way. Ride the moving platforms across the vast chasm, collecting as many Nerkmids as possible. Don’t fall off the platforms, or you will lose a life. Once you reach the lowermost platform, there is land beneath you, so you can fall down, but there are Green Lizards walking around, whom you might collide with, taking damage in the process. Destroy them and walk toward the stranded Aisha to finish the level. ---Planet Two: Octozodi--- Here are the enemies which you must watch out for: ---Blue Slugs: They stay in one place and shoot one projectile at a time. Jump on them. ---Roly-Polies: They simply roll around. Jump on them. ---Purple Slime Molds: These creatures aren’t scenery; they are enemies, so you will take damage if you run into them. They can only be destroyed with a Force Field, so don’t jump on them. ---Green Slime Lumps: They just walk around. Jump on them. ---Red Buttons: They stay in one spot and shoot three projectiles at once. Jump on them. ---Act One--- You will start by jumping up the stationary platforms, defeating the Blue Slugs in the process. At the top, destroy the Blue Slug and the Roly-Poly which you will find, and eat the Gross Food. Walk onward, avoiding the Purple Slime Molds and destroying the Green Slime Lumps. To the left, there will be an area with Nerkmids. Jump over the slime molds, not on them because they can damage you. Then defeat the Red Button and collect the Nerkmids. To the right, there will be a Speed Wing, which isn’t required to complete the level. Take it if you wish; it’s hard to avoid anyway. Make your way through the long stretch of flat land, collecting all of the Nerkmids and destroying the enemies in the process. Then the level ends. ---Act Two--- Ride the moving platform over to the next piece of land. Wait until the next moving platform is beneath the floating Force Field, then fall down onto the platform, collecting the Force Field. Grab the floating Nerkmids and destroy the enemy beneath them using your Force Field. Then fall down onto the long stationary platform, destroying the Roly-Polies who are on it. To the left of the long platform, there is a moving platform. Ride it to the left, but don’t destroy the Green Slime Lump yet. Wait until it is right next to the wall, then jump on it for a height boost and lunge toward the wall. You will pass through the wall, leading you to a secret area. Collect the twelve Nerkmids that you have found, then return to the long platform. To the right, ride the moving platform to the next stretch of land. There will be a few enemies; destroy them. Then you will see a platform which is moving up and down. Jump on it, then fall down to reach the Gross Food that you will see. Walk right to the next wall, then fall downward onto the thin platform. Defeat the Roly-Polies and grab the Gravity Boots. Return to the area before the thin platform, using the height boost that the boots will give you. If you perform a wall jump, you will be able to reach a Gross Food. Then return to the area where you found the Roly-Polies. Walk right, defeating more Roly-Polies. Then destroy the three Red Buttons and reach the end of the level. ---Planet Three: Wuba Secundus--- Here are the enemies which you must watch out for: ---Red Slugs: They simply walk around. Jump on them. ---Blue Geysers: They stay in one spot and spew acid. They can only be destroyed with a Force Field, so don’t try to jump on them. ---Bubbles: They simply walk around. Jump on them. ---Orange Swirlies: They move around a little bit and shoot projectiles, one at a time. Jump on them. ---Orange Creatures with Eyes: They stay in one place and shoot projectiles, three at a time. Jump on them. ---Act One--- Ride the moving platform upward and defeat the Red Slug, then collect the Gravity Boots. Go back and wall-jump against the first wall because there are Nerkmids floating in the air. Then return to the area where you found the Gravity Boots. There will be a Force Field beneath you. Grab it, and wall-jump to get out of the pit. However, don’t fall off the land, or you will lose a life. There will be walls above you. Wall-jump against those, collecting the Nerkmids. Use your Force Field to destroy as many enemies as possible before it wears off, including the Blue Geysers. You can collect the Nerkmids later. There will be an open area with tons of enemies; use your Force Field to defeat them, and collect the Gross Food. Then go back and grab the Nerkmids. Next up is an area with several thin platforms. Jump across them and destroy the enemies, trying to avoid the Speed Wing which will make your job more difficult. Make your way downwards and ride the moving platform to the right; the Nerkmids to the left of you are too hard to collect and not worth spending your air bonus. While you are riding the platform. BEWARE of the Orange Swirly who is shooting projectiles at you, trying to knock you off the platform. I went down countless times because this enemy hit me, and I fell into the chasm as a result. Jump to the next piece of land and defeat the Orange Swirly. Then the level ends. ---Act Two--- You will start off in a passageway which contains Red Slugs and the Orange Creatures with Eyes. Avoid the Speed Wing because it will make you run too quickly to defeat the enemies. Walk to the right, defeating all of the monsters. Also, watch out for the projectiles from the enemies above you. Remember, projectiles can pass through walls. You will reach a series of moving platforms that will take you upward. Ascend them, collecting the four floating Nerkmids. Then there will be a large area containing a moving platform. If you don’t see it, wait for it to arrive. It will be impossible to get through the area without it because there are blocks of land in the way. Once you see it, jump on it, collecting the Gross Food. Ride the moving platform leftward. When the blocks of land obstruct your passage, jump on them while the moving platform passes beneath them. Once the platform is available again, return to it. Don’t try to defeat the Orange Swirlies below because they aren’t worth spending your air bonus. Make sure that you avoid their projectiles. Once you reach the next stretch of land, there will be another series of moving platforms which will take you upward. Ascend them. Once you reach the top platform, lunge at the wall which is situated to the left of you. You will pass through the wall, revealing a secret area. Grab the Speed Wing, the Force Field, and the Nerkmids. Return to the area with the moving platforms and jump over them. Then sprint through the next area, a long stretch of land. All of the enemies will be defeated by your Force Field. You will arrive at an area with moving platforms which will take you downward. Wait until your Speed Wing wears off so that you don’t accidentally fall into the chasm. Make your way downward, collecting as many Nerkmids as possible. Then ride the large platform to the right. Jump onto the land and walk to your right. Then the level ends. ---Planet Four: Gorignak V--- Here are the enemies which you must watch out for: ---Stone Wheels: They simply roll around. Jump on them. ---Sludgies: They move somewhat and shoot projectiles at you. Jump on them. ---Grey Statues: They move back and forth. Jump on them. ---Spike Mounds: They stand still, but they throw spikes at you. There will be a Force Field nearby, so use that to destroy the Spike Mounds. ---Brown Cannons: They stay in one spot, but they shoot projectiles at you, five at a time. Jump on them. ---Act One--- Start out by defeating the enemies below you and collecting the Nerkmids above you while destroying the nearby Grey Statue. Then grab the Force Field and defeat the Spike Mounds. Ride the moving platform upwards and collect the Speed Wing. Use the Force Field to destroy the Sludgy and collect the Nerkmids to the left of you. Then ride the moving platform to the checkpoint. Jump across the pillars, defeating the Sludgies while avoiding their projectiles. Grab the Gravity Boots and walk right. You will reach an area with a Stone Wheel, so destroy it. Then you will see an open space between two walls. Wall-jump upwards, and you will find Nerkmids and a Speed Wing. The wing might not be very helpful because you will run too quickly. To the left of the wing, there are more Nerkmids. Above you, you will see several enemies huddled in one area. Don’t bother with them, since they are far too difficult to defeat without taking damage. Return to the area where you found the Stone Wheel. Walk right, then jump upwards and pass through the checkpoint. There are replacement Gravity Boots in case you lost yours by taking damage. Wall-jump against the wall to the left of the checkpoint to find a Gross Food. Then cross the platforms, avoiding the projectiles and collecting the Gross Food. Defeat the Sludgies if you can without getting hit. Don’t fall off the platforms, or you will lose a life. Then the level ends. ---Act Two--- Start Act Two by collecting the Nerkmids and defeating the enemies. Then jump across the chasm; don’t fall down, or you will lose a life. As soon as you cross it, MAKE SURE YOU DUCK. There is a Sludgy who will shoot projectiles at you, trying to knock you into the chasm. This monster defeated me several times. Leave the Sludgy for later, since he is on the other side of the wall. Then ride the moving platforms up and left to collect the Nerkmids, making sure that you don’t fall into the aforementioned chasm. Then go to the large block of land on the right. Jump over to the Brown Cannon and defeat it. Then go downwards and get your revenge on the Sludgy. MUAHAHAHAHA!!! Then jump across a new chasm, collecting the Nerkmids. Defeat the Grey Statues, then use the nearby Force Field to destroy the Spike Mounds. While your Force Field is still active, ride the platform upward, saving the helpful items for later. Walk left, destroying the enemies with your Force Field. Cross through the checkpoint, then jump onto the first thin platform. You will see a thick block of land; jump on it. Walk right, using your Force Field to annihilate all of the enemies with ease. However, don’t rescue the scientist yet. Return to the area where you found the Spike Mounds and collect the Nerkmids and the Gross Food. Then return to the thicker block of land next to the checkpoint. Proceed left and jump across the platforms, collecting the Gross Food. Grab as many Nerkmids as possible; the platforms move, and you don’t want to fall down. Then return to the area where you found the scientist and rescue him. ---Planet Five: Kreludor--- Okay, Kreludor is actually a moon, but there is a scientist stranded there, so you have to go there to rescue him. Here are the enemies which you must watch out for: ---Yellow and Blue Robots: They just move around. Jump on them. ---Spherical Robots: Like the Yellow and Blue Robots, they simply move around. Jump on them. ---Green Laser Turrets: They stand still and fire lasers, one at a time. They can fire vertically, horizontally, or diagonally, depending on where you are standing. Jump on them. ---Silver Geysers: They stay in one spot and spew acid. They can only be destroyed with a Force Field, so don’t try to jump on them. ---Brown with Three Cannons: They stand still and shoot projectiles, three at a time. Jump on them. ---Act One--- Start by grabbing the Force Field to the right of the Brown Enemy with Three Cannons. Use the Force Field to destroy as many monsters as possible before it wears off. Then return to the start of the level and ride the platforms upwards. There will be a Green Laser Turret to the right of you; defeat it if you haven’t already. Then there will be a Green Laser Turret to your left. Destroy it, then grab the Gravity Boots. Use them to collect all of the Nerkmids and Gross Foods in the area. You won’t reach 20,000 points without them, and every 100 Nerkmids collected will earn you an extra life, in case you mess up. Proceed rightward, defeating any enemies that haven’t gone down already. Right before the checkpoint, there will be replacement Gravity Boots, in case you lost yours by taking damage. Cross through the checkpoint, then proceed downward, collecting all Nerkmids and destroying all enemies. Then go to the platform to the right of the checkpoint. There will be moving platforms to your right; cross them to reach the next checkpoint. To the right of it, there will be Nerkmids and a Gross Food, guarded by a Green Laser Turret. Destroy it, then collect the goodies. Then grab all the Nerkmids beneath you, defeating the Yellow and Blue Robots in the process. There will be one last moving platform before the land becomes less elevated. Use this platform to collect the nearby Nerkmids before jumping down. If you don’t have the Gravity Boots anymore, you won’t be able to jump back up. Then the level ends. ---Act Two--- Start by destroying the Yellow and Blue Robot as well as the Brown Enemy with Three Cannons, dodging the latter’s projectiles. Then there will be a pit full of monsters. Avoid it and take the upper route because the enemies are way too difficult to defeat and not worth spending your air bonus on. Above the pit, there will be a moving platform guarded by a Green Laser Turret. Duck to avoid its projectiles, then ride the platform over to it and destroy it. There will be Gravity Boots above the turret. The boots are hard to see because they blend in with the scenery. Grab the boots, then jump upward to the next platform. Wait for the enemies above you to fire, then jump upwards, landing on the platform to the right of you. Defeat the Brown Enemy with Three Cannons, avoiding all projectiles. Above you, there will be two walls with a space between them. Perform a wall jump; you don’t want to miss this area. (Leave any uncollected Nerkmids beneath you for later.) After you wall-jump, you will find an open area with tons of Nerkmids and two Gross Foods. There will be enemies guarding the Gross Foods, so destroy them. Make sure you don’t get hit. If you take damage, you will have to go back down and grab replacement Gravity Boots, which will take up time, lowering your air bonus. Once you have collected all of the goodies and defeated the enemies, fall down the space between the two walls. As soon as you land. BE PREPARED TO JUMP. There will be two Green Laser Turrets, one on each side of you. They will fire at you, so jump out of the way to avoid the projectiles. Proceed rightward, destroying enemies if you can; it is difficult not to get hit. Collect any remaining Nerkmids, then cross through the checkpoint. At this point, PLEASE DON’T TAKE DAMAGE for the rest of the level. If you do, you will lose the Gravity Boots, which are needed to access tons of goodies. If you accidentally take damage, you can lose a life on purpose, then restart at the checkpoint and collect the boots to the left of you. Jump over the Silver Geysers and walk rightward, defeating all enemies and grabbing the Gross Food. There will be a Green Laser Turret beneath you. Land on it, but make sure beforehand that it isn’t shooting a laser. Then there will be another turret to the left of you. Destroy it, then lunge at the wall. You will walk through the wall, revealing another secret area. Grab all of the Nerkmids and Gross Food; there are lots of them. Then return to the area where you defeated the second turret. Walk rightward, defeating the Spherical Robots and collecting all Nerkmids. There will be a Speed Wing in your way; it will make you move too quickly, so wait for it to wear off. Then walk to your right, defeating all of the turrets. Take your time, ducking if necessary to avoid the projectiles. You will reach a series of moving platforms which will take you upward. Ascend them, and then jump over to the piece of land to the left of you. This area is only accessible with the Gravity Boots, which you worked so hard to keep! Walk leftward, and you will find a whopping 1200 points worth of Nerkmids and Gross Food! This bonus is essential for a trophy score. Then return to the moving platforms. Jump over to the piece of land to your right, and the level will end. ---Final Boss--- The final scientist is guarded by a giant robot. It will try to jump on you and shoot projectiles at you. To avoid its jumping, head to the absolute left or right of the screen (whichever is more convenient) and duck. The robot has two types of projectiles which you must avoid. Its green lasers fly in straight lines and will pass over your head harmlessly if you are standing on the ground. Its orange fireballs fly in an arc. To attack the robot, you must jump on its head. Use the platforms for a height boost; otherwise, you won’t be able to jump high enough. You can hit the robot three times before you must return to the ground. You don’t have to hit it right on the green dome on its head; just in the general area. As soon as the battle starts, jump on its head three times. Then wait for it to attack. After it attacks, jump on it another three times. Rinse and repeat. Please bear in mind that your air bonus is still being tracked, so don’t run out of time, or you will lose a life. After hitting it ten times, it will explode, earning you 1000 points. Then the game will be complete. Congratulations! ---Final Thoughts--- Assignment 53 is a fun and challenging game; I love collecting the goodies on Kreludor. Lots of practice is required to obtain 20,000 points, but you will enjoy it. If you are going for a trophy, the best time to earn it is the first day of the month. The high score tables have just reset on the first of the month, so the scores are lower. I earned a gold trophy on the first day of the month with a score of 24,347 points. Good luck!
|